
Learn how to use your Wisper Torque LCD to control your e-bike’s power assistance, lights, and settings. Follow these simple steps to get the most from your ride.
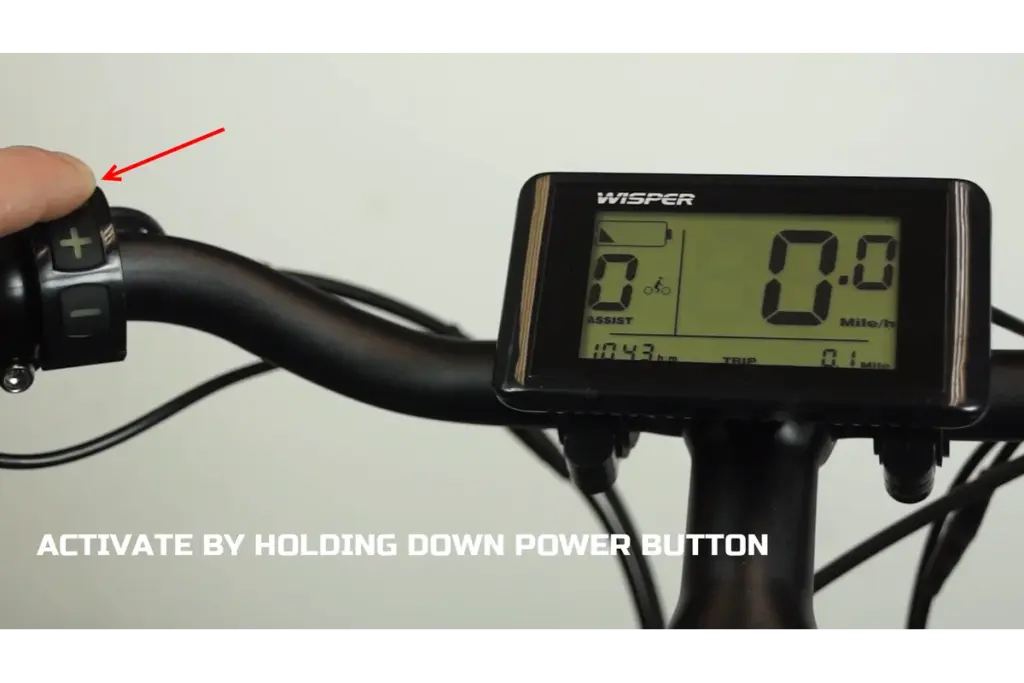
Hold down the ⏻ Power button until the screen turns on.
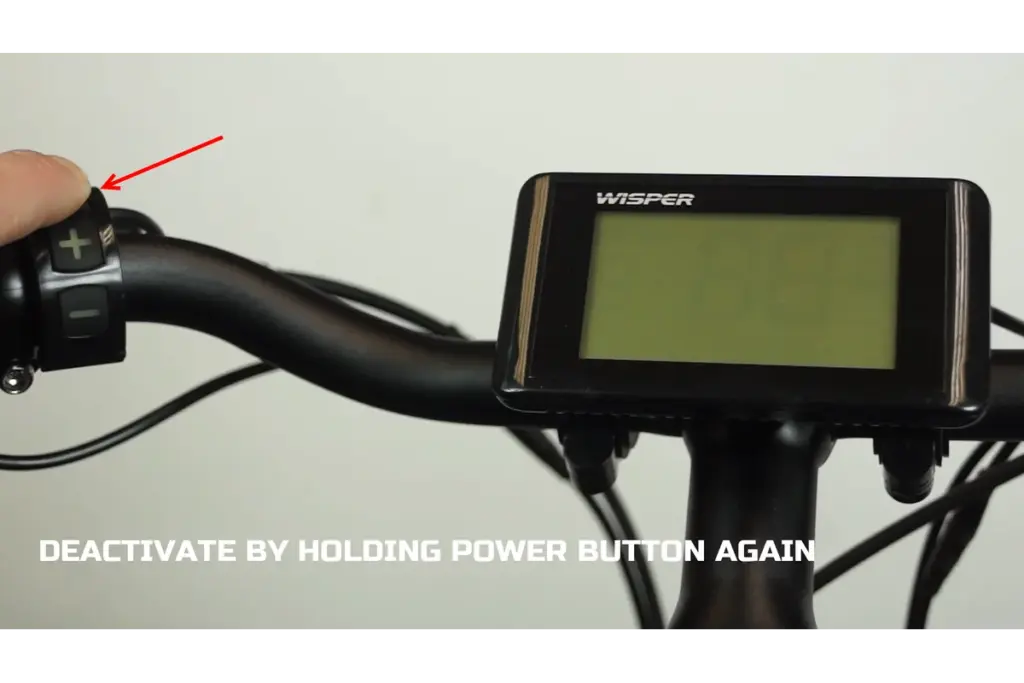
Hold the ⏻ Power button again to switch the system off.
(Always power down your display before storage or transport.)
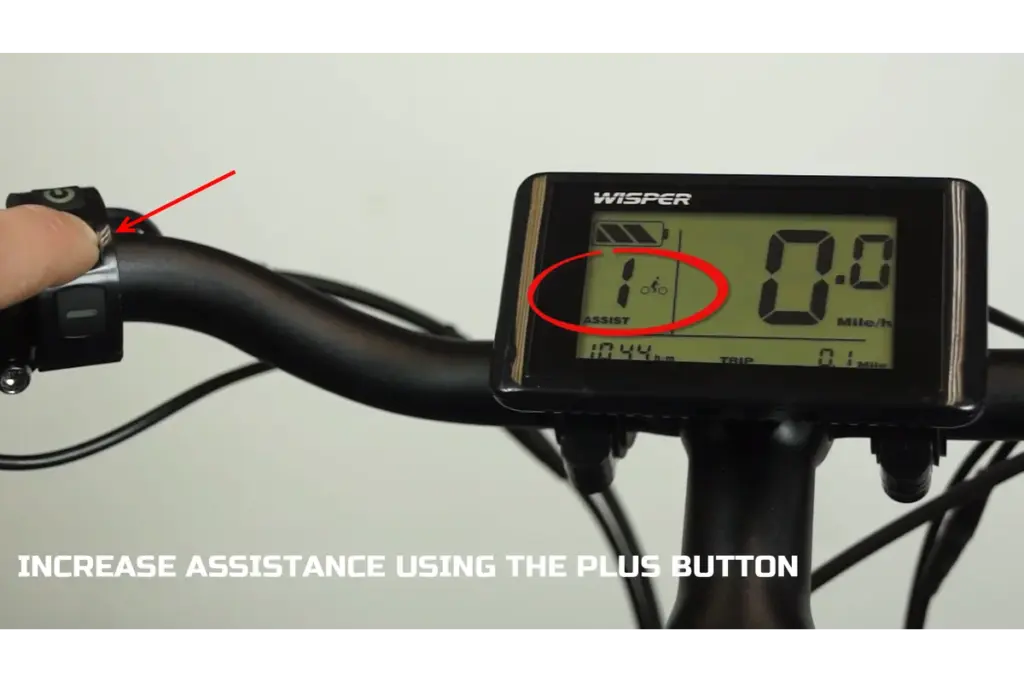
Increase Assistance: Press the “+” button to raise the power level for easier pedalling.
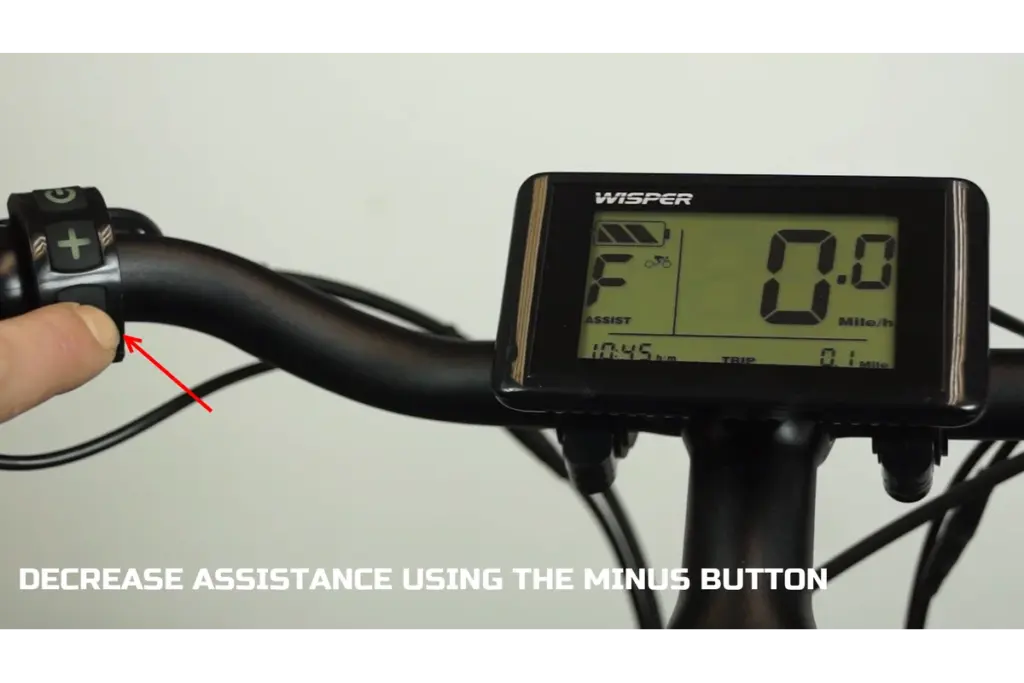
Decrease Assistance: Press the “–” button to reduce power and extend battery range.
(Tip: The current assistance level is shown at the bottom of your display.)
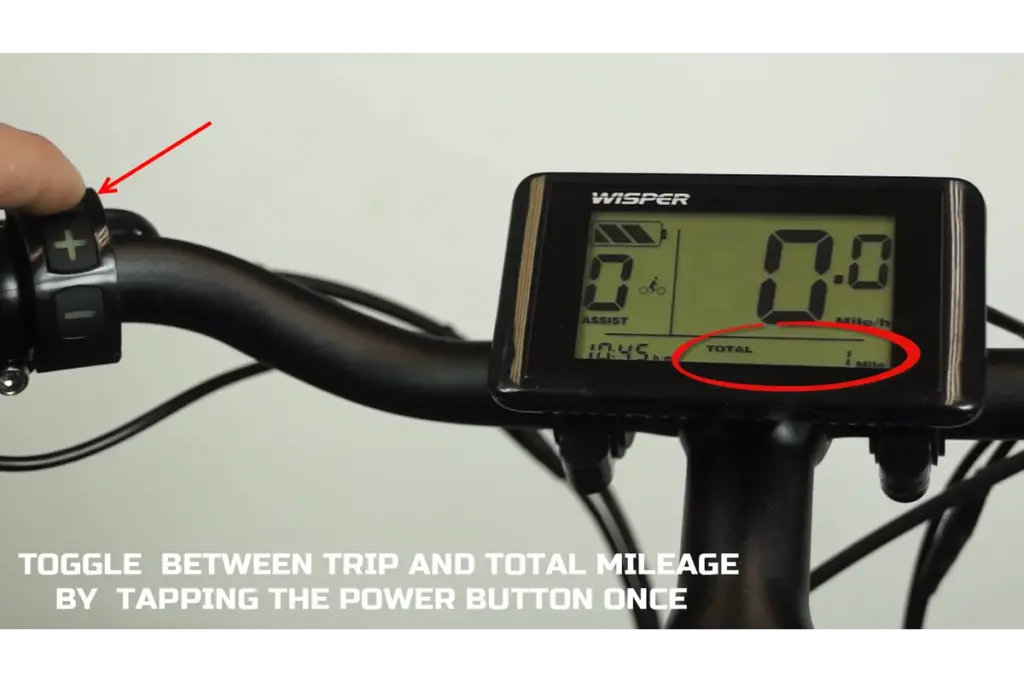
Switch Display Modes: Tap the ⏻ Power button once to toggle between Trip Distance and Total Mileage.
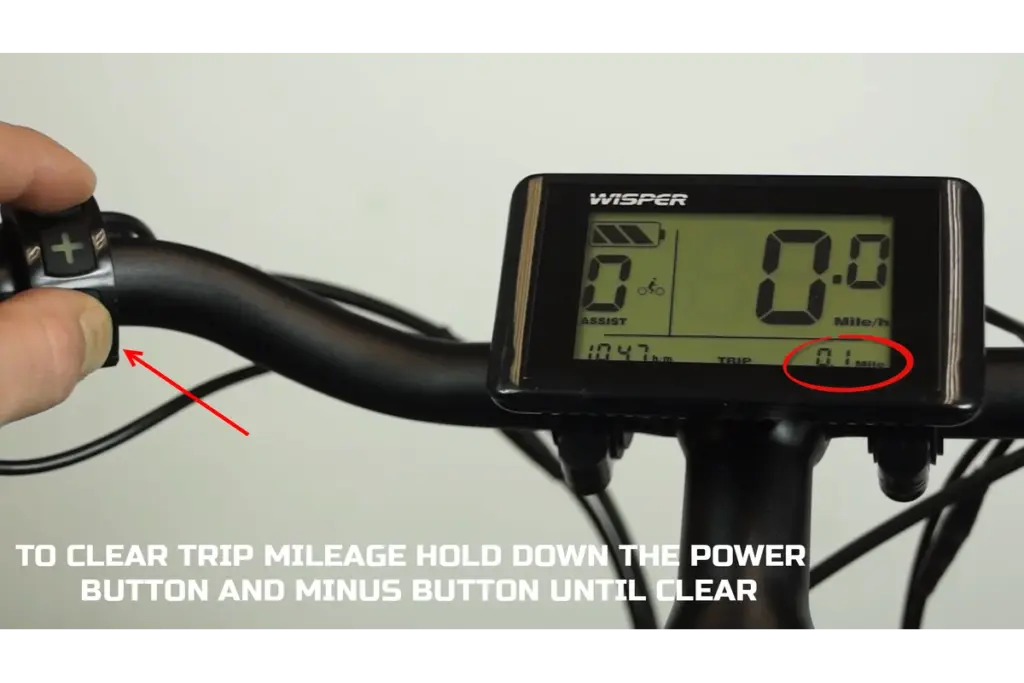
Clear Trip Mileage: Hold down ⏻ Power and “–” together until the trip distance resets to zero.
(Ideal for tracking individual journeys or post-service resets.)
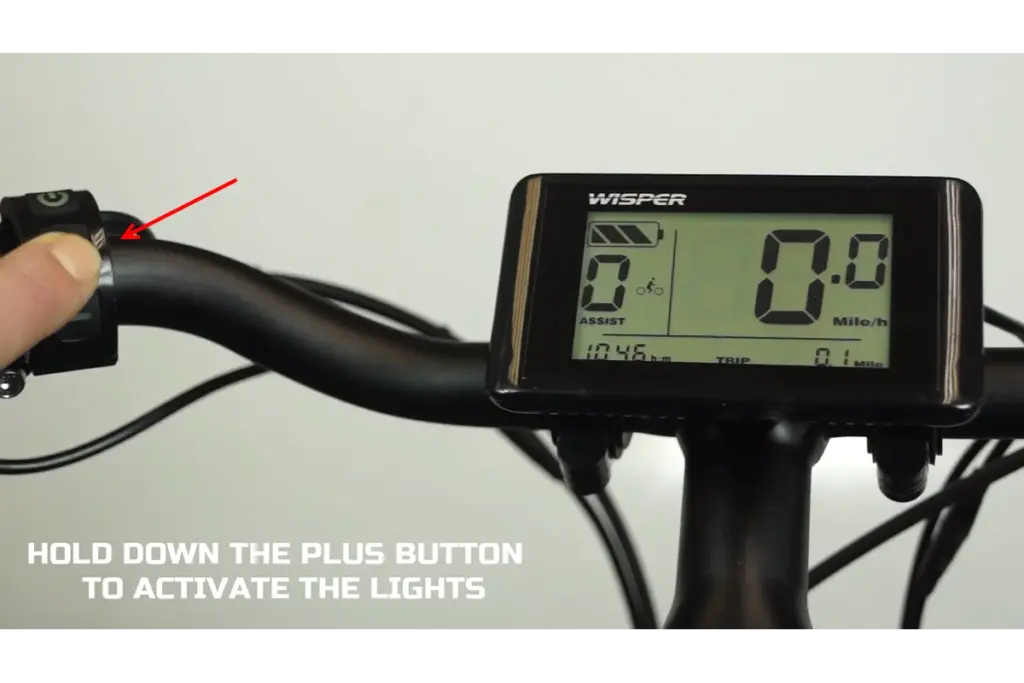
Turn On Lights: Hold the “+” button.
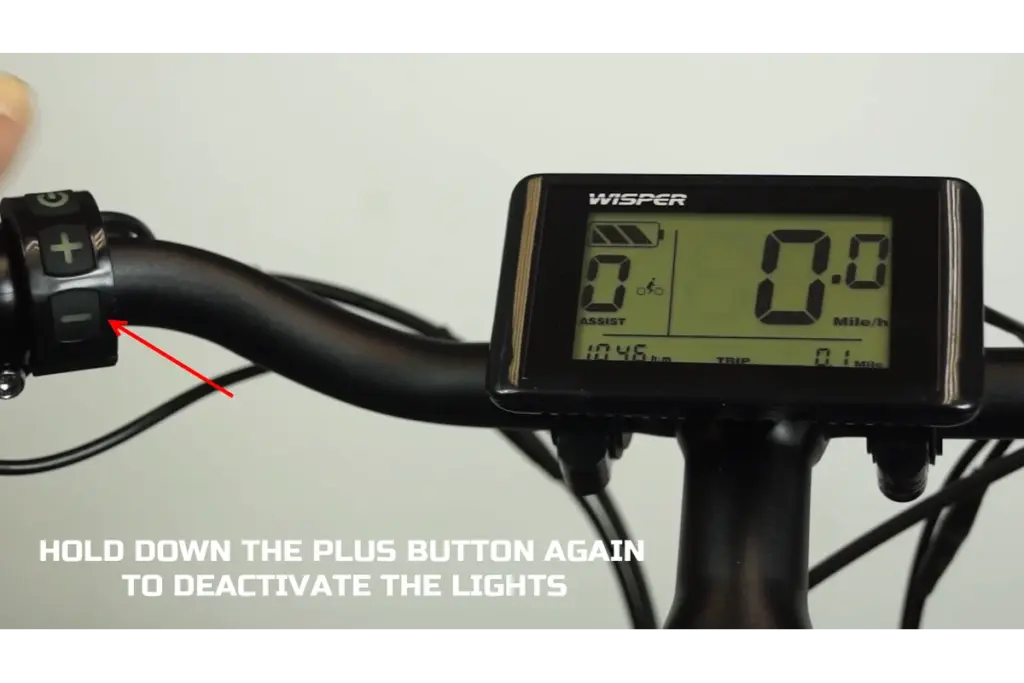
Turn Off Lights: Hold the “+” button again to deactivate.
(Lights automatically switch off when the system is powered down.)
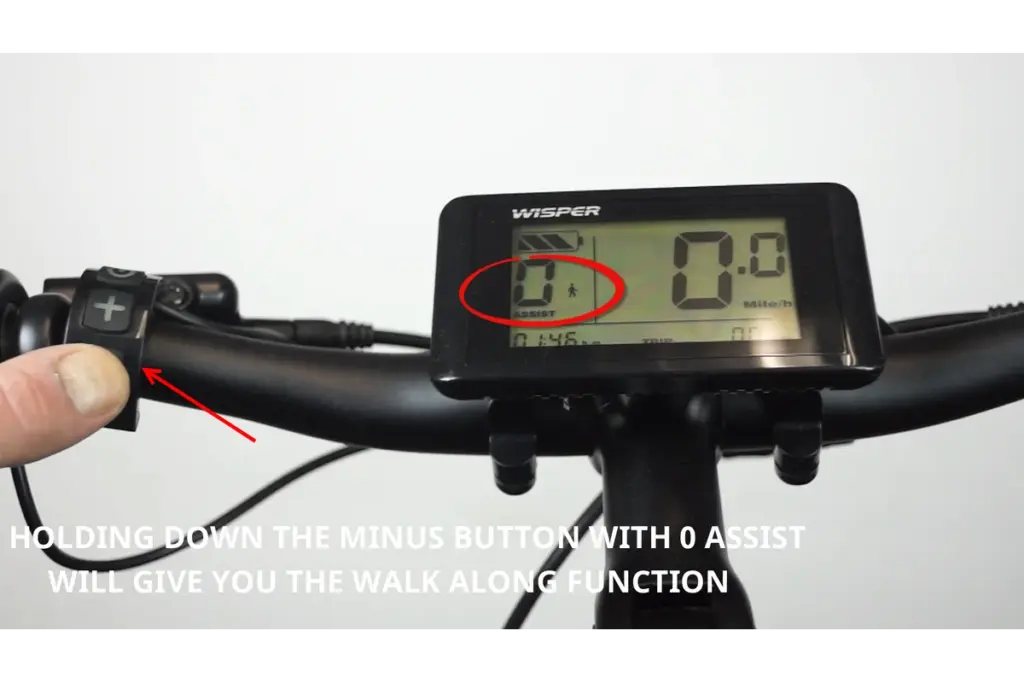
When assistance is set to 0, hold down the “–” button to activate Walk Assist Mode.
This feature gently propels the bike forward—useful when walking up steep hills or manoeuvring in tight spaces.
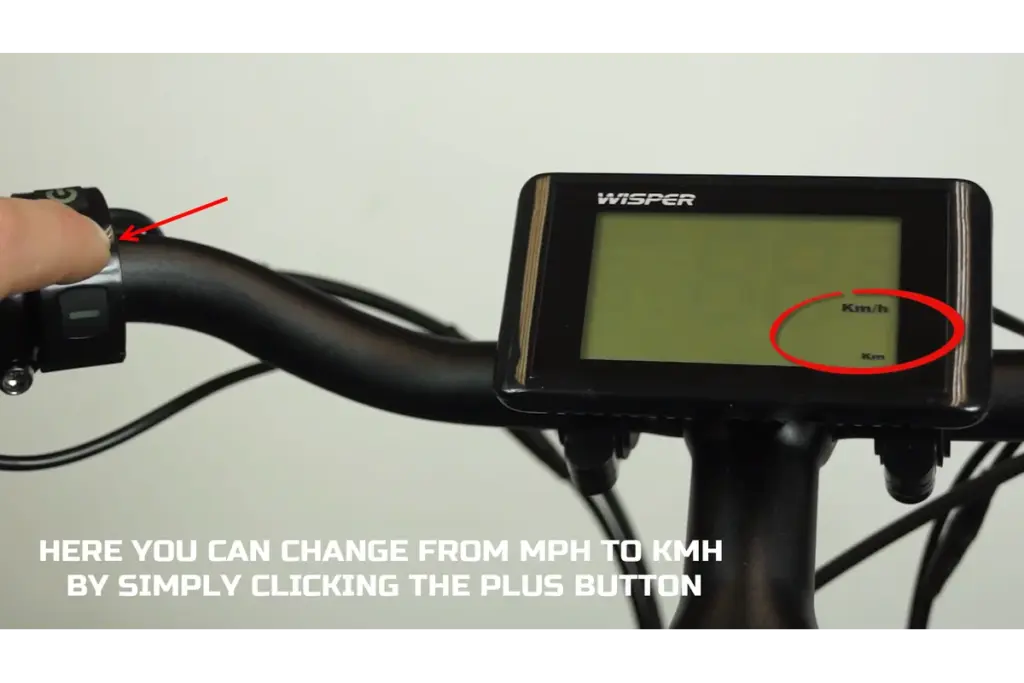
To open the Settings Screen, hold down both “+” and “–” buttons simultaneously.
In the settings menu, use “+” to switch between MPH and KMH.
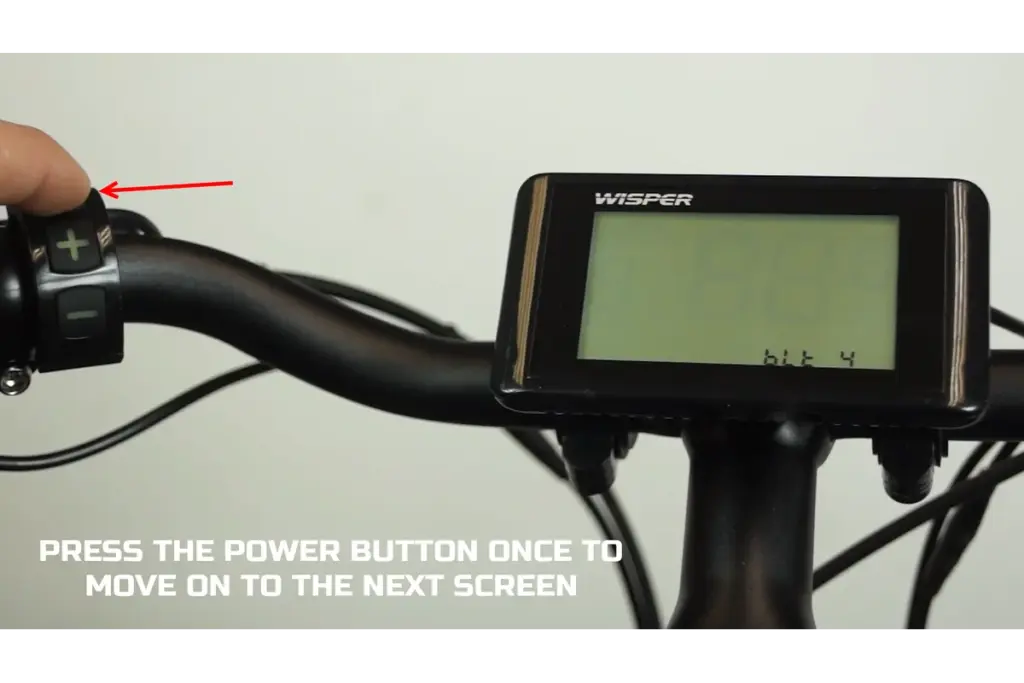
Press ⏻ Power once to confirm and move to the next screen.
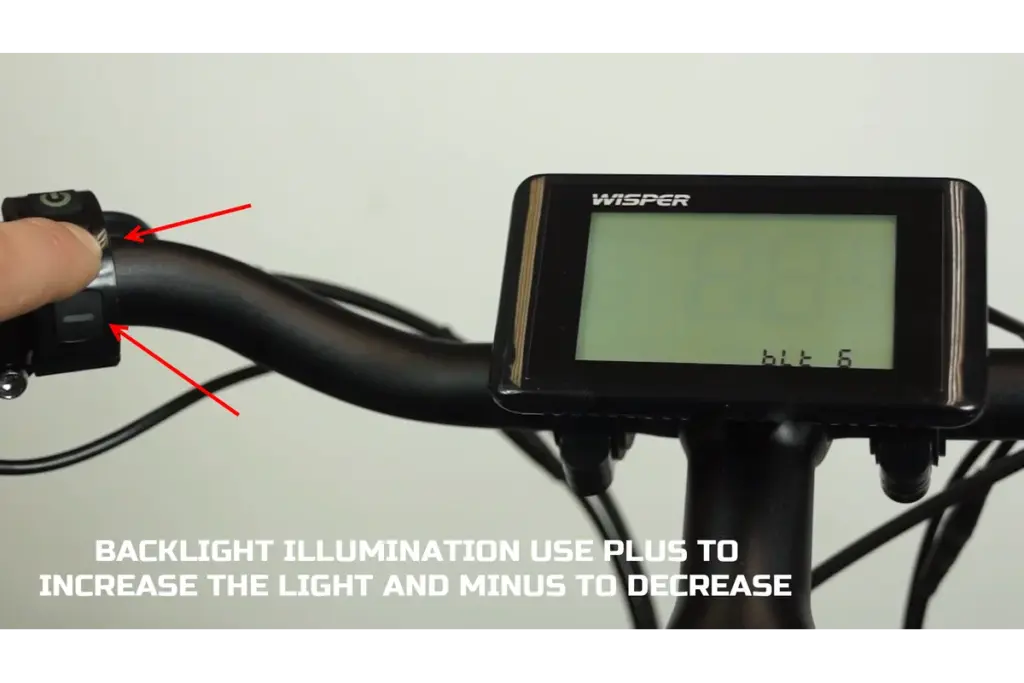
Use “+” to increase or “–” to decrease the screen brightness.
Press ⏻ Power once to continue.
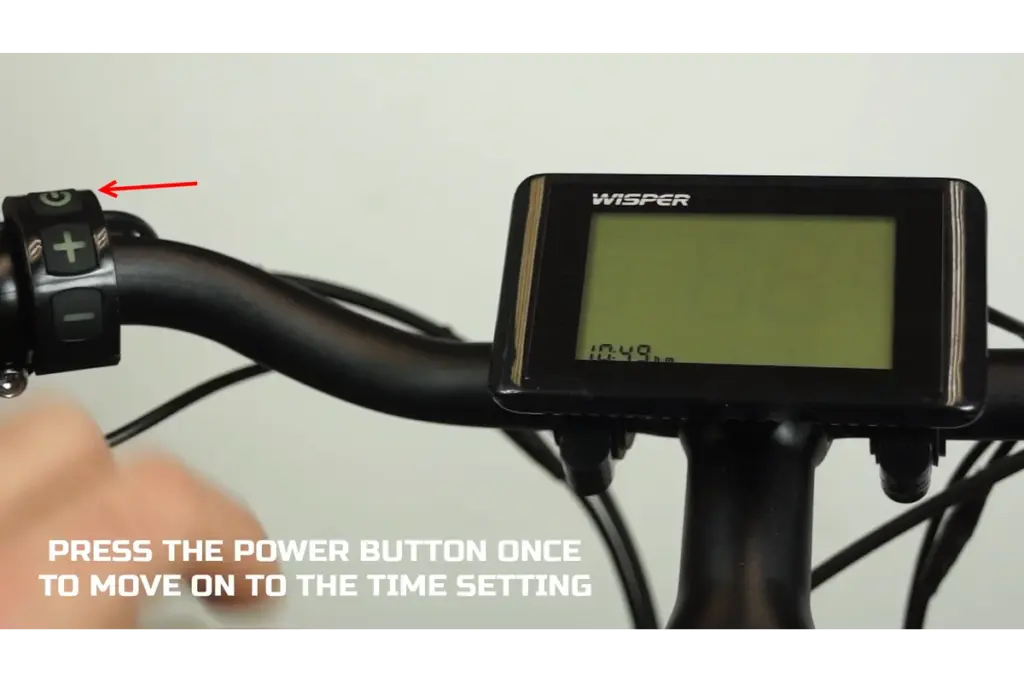
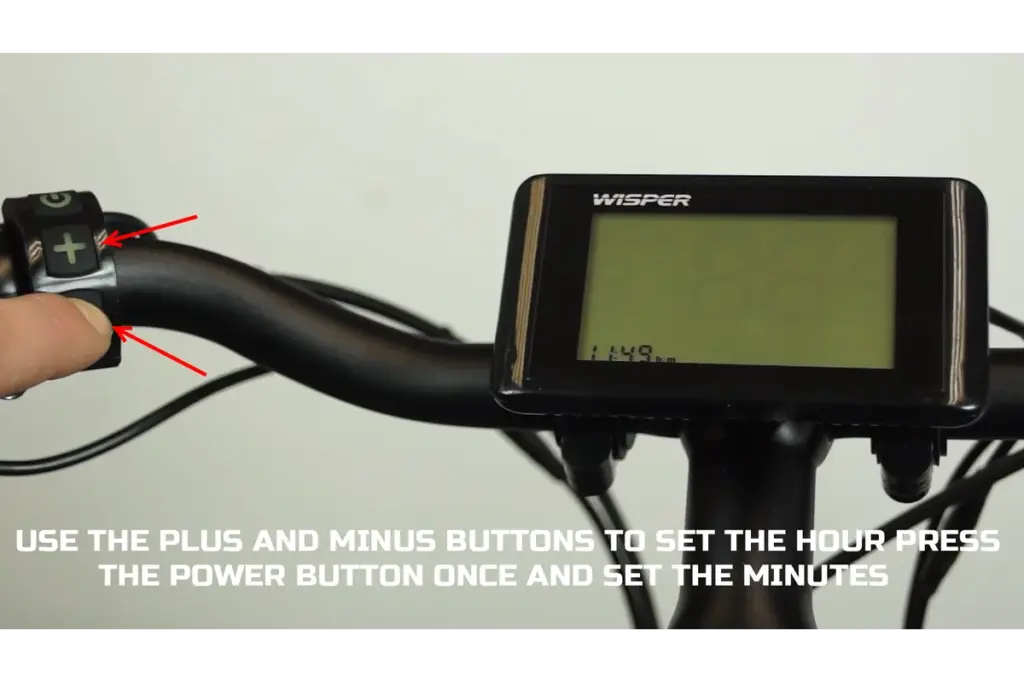
Use “+” and “–” to set the hour.
Press ⏻ Power to move to minutes, then adjust again.
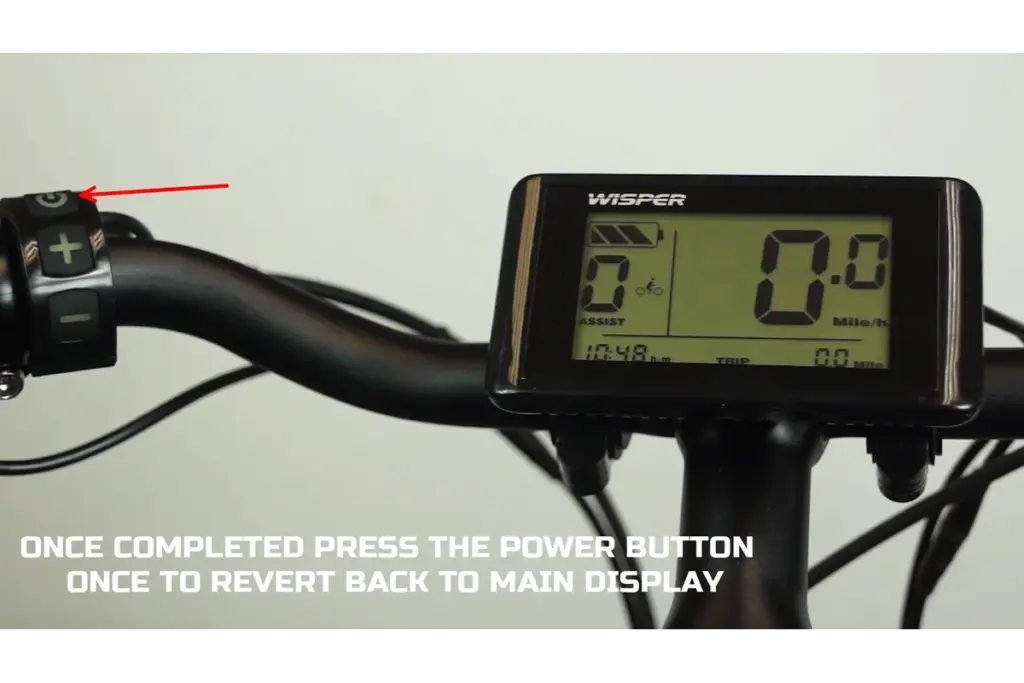
Press ⏻ Power one final time to save and exit.
When setup is complete, press the ⏻ Power button once more to return to the main screen.
Your adjustments are automatically saved for your next ride.
| Function | Button Action |
|---|---|
| Power On / Off | Hold ⏻ Power |
| Increase Assist | Press + |
| Decrease Assist | Press – |
| Trip / Total Mileage | Tap ⏻ Power |
| Clear Trip | Hold ⏻ Power + – |
| Lights On / Off | Hold + |
| Walk Assist | Hold – (assist = 0) |
| Settings Menu | Hold + + – |
| MPH / KMH | + in Settings |
| Backlight | + / – |
| Set Time | ⏻ Power to cycle, + / – to adjust |